A few months back I decided I needed my own craft space / office. While designing this room I decided that I wanted some decorative shelving to flank our huge Ikea mirror that hangs center on the main wall. I wanted to be able to display craft supplies and fun things on these shelves when the room is all complete.
After pricing several options at Ikea and not falling in love with any of the options they had available, I begged the hubby to help me make them. It ended up costing the exact same as if I had of bought the nicer ones at Ikea, but the difference is I can claim I made these shelves and they match so much better with my furniture. I needed a shelf that resembled the molding that my bookcases also have.
Here’s what we did…
We went to Home Depot and chose a pine board that was about 7.5″ wide x 10′ long. We made sure it was straight and that it was nice and clean looking. We chose the pine based on price, so choose what you like and fits your budget. I then found the corbels, I bought the cheapest I could find – also made of pine. I also chose an inexpensive molding for the edges. It is only about 1.5″ wide and had a little lip that rested against the pine board which made it so easy to keep straight when we put it on the shelves. I needed to make 4 shelves – 2 that measured 26″ long, and 2 that measured 30″ long. We ended up having the guys at Home Depot cut the wood for us while we were there, saved us time!
First thing we did was watch a video on you tube on how to miter corners for the trim piece!
You can see the video we watched HERE. I’ll be honest this was the worst part of making these shelves. We were so frustrated trying to figure out how to miter the corners since neither one of us had ever done it before. My suggestion is to have the guys at Home Depot show you when your in the store. The only cut we actually made right was the very last corner of the last shelf, the rest were all funky. All I can say is thank goodness for wood putty! So once you get all your trim mitered, you will place a small bead of wood glue to the edge of your pine board. Then using finishing nails you will nail the trim to the two end pieces and front. Make sure to using the finishing nail tool to ensure your nails get flush with the trim. You can use wood putty to fill in the holes and sand lightly.
After your trim is on it’s time to measure and screw in your corbels. I chose to attatch mine about 5″ in from the ends. We screwed them in from the top of the shelf with two screws to be sure they were sturdy. Make sure the corbel is flush with the back end of your shelf so they sit nice on the wall.
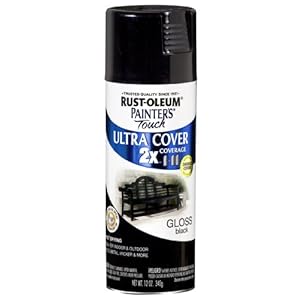
Once I finished filling flaws with the wood putty, it was time to paint. I decided to be quick and just give it all a coat of spray paint. I chose to use Rustoleum’s Painter Touch – 2x Ultra Cover. This was just so I didn’t have to prime them. I chose to go with the Gloss Black since all the furniture in the room is black. I really like the way these cans spray by the way! I ended up only needing 2 cans for all 4 shelves, two coats each shelf. Let it dry really well between coats.
When it is all dry your ready to hang your shelves. I recommend using this method for hanging them found HERE. It really helps cut down on frustration and holes in your walls.
Now I have great shelves and I’m in love with them and the possibilities of what can go on them.
Cost of Project:
Pine Board = $11
Pine Molding = $15
Corbels = $16
Finishing Nails = $2
Wood Glue = $4
Spray Paint = $8
TOTAL = $56.00


Great job on the shelves! I have those owls, except in blue/yellow/green, love them. 🙂
xoxo,
Melissa
Wow! This looks great! I am so impressed!