{Disclaimer: I am a member of the DecoArt Core Blogging Program. I receive compensation and product for all my posts, but all opinions and ideas are my own.}
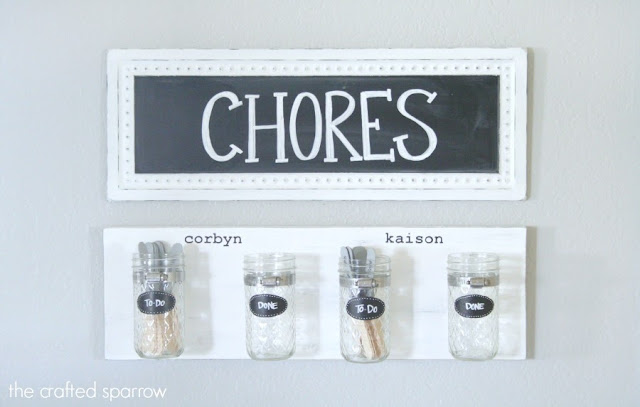
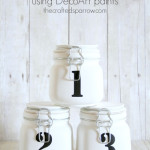
We used to have a simple dry erase chore chart system for our boys, and quite frankly it wasn’t cutting it. First of all it wasn’t cute, and secondly they never used it! We are firm believers on our boys learning to pitch in on the household duties, no we don’t pay allowance for these things…we feel it’s there duty as a member of this family. Don’t worry they get money all the time for other things, they actually have more money than me at times! I decided I needed to create something a little more functional for the boys to use. So I made this Mason Jar Chore Chart. I got the inspiration from Kelli at Lolly Jane, you can see her DIY Mason Jar Bathroom Storage HERE. I took the same idea and turned it in to a chore chart.
{It was incredibly dark and raining when I took these pictures, so they aren’t my best photos and it was impossible to get a step by step of the instructions}
Supplies:
– Pine Board {mine is 22″}
– 4 Mason Jars {I used the fancy ball jars}
– Americana Acrylic Paint {white & slate gray}
– Americana Chalkboard Paint
– Foam Brushes
– 4 Large Hose Clamps
– Sand Paper
– Vinyl Stencil for names {optional}
– Large Popsicle Sticks
Start by painting your piece of wood with the slate gray, you don’t have to be precise…just get a quick coat on. Then follow with 2 or 3 coats of the white paint when the gray is dry. Once the white paint is dry take your sandpaper and rough it up on the edges and the front of the board, this will give it an aged look. You can paint yours solid, but I preferred mine to look a little worn. I wanted my jars to have labels on the front and luckily the fancy Ball mason jars I bought had a cute little smooth spot for labels. So I painted a chalkboard label on each jar with my Americana Chalkboard Paint. Follow the instructions for glass. I then used a chalkboard marker to write “to-do” and “done” on each boys jars. Now you can measure your board and where you will evenly need to place your hose clamps. Mark it with a pencil. Before you attach them flip your board over and hammer in 2 saw tooth hangers. Then follow Lolly Jane’s tutorial HERE for attaching the hose clamps. Place your jars in the hose clamps and tighten. I painted the end of my popsicle sticks gray and used a permanent marker to write the chores on, painting them helped the marker not to bleed. It’s perfect for the boys, and pretty enough for me…hopefully this gets them moving on those chores now!
Did you know that DecoArt launched a knew BLOG? I love the design of the site, so cute. Please stop by and give it a peak, they will be featuring projects from some really great bloggers!





WHAT!?!?! This makes me want to come over and Clean your house.. How Stinking Cute is this.. LOVE!!! Pinning 🙂
xoxo
Adorable, Rebecca! I’ve pinned it and I’m including a link back in Friday’s DIY highlights. Thanks for sharing. Wish I had this growing up…I’d have made it competitive with my sister and won every time! haha!
Hеllo, its good article on the topic of medіa print, we all be familiаr ωith media is a impressive source of information.
Feel free to surf to myy websige … cubby house masterton