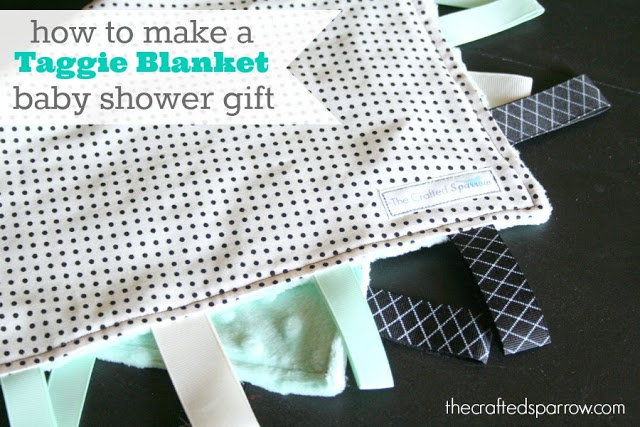
Are you like me and you love to give a gift that has a personal touch to it? When I’m invited to a baby shower I love giving the new mom things that are practical, and on trend…let’s face it just because we are becoming a mom doesn’t mean our personal style has to go out the window. So I often times will make gifts that are on trend with color & patterns. So I thought today I would show you my Taggie Blanket Tutorial.
One of the things my youngest son enjoyed most until he was about 1 1/2 was his Taggie Blanket. I made several of them and he wouldn’t fall asleep without one by his cheek. They are soft and perfectly cuddly for new babies. Plus you can customize a Taggie Blanket with the colors you want, sometimes it’s hard to find baby gifts that aren’t just pink & blue.
Supplies:
– 16 x 16″ Square cut of Minky fabric
– 16 x 16″ Square cut of Cotton print fabric
– Ribbon to coordinate with your fabric choices
– Sewing machine
– Thread
– Scissors
1. Pre-wash your fabric {I have a secret, I almost never do this…I know it’s terrible to those that sew! I just don’t do it. Almost all my stuff still comes out perfect, so I don’t mind.}
2. Once your fabric is ready, you will need to cut two 16 x 16″ square pieces {1 minky piece, and 1 cotton piece}. You can choose to use flannel backed satin instead of the cotton print, but I’ve used it a ton and prefer how much easier it is to sew with the cotton print…plus the prints are so cute!
3. Set your fabric aside and begin cutting your ribbon, I like to stick with 3 coordinating ribbon choices. Using gross grain ribbon, or a wider satin ribbon is best. Cut each length of ribbon to 5″. I like having 5 tags on each side of the taggie blanket.
4. Fold each ribbon length in half and iron them at fold to give them a nice crease. For ribbon that has a printed design on it I suggest using a lightweight cloth over top before ironing to avoid the design melting or bleeding.
5. Now space all your ribbon tags evenly along the edge of your cotton print. I placed mine evenly across using a ruler and pinned in place.
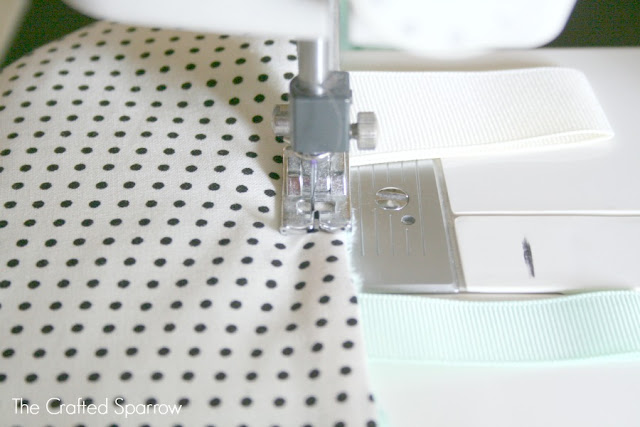
6. Once all ribbon tags have been pinned to the cotton print fabric sew a straight stitch along each side to secure the ribbon in place. I gave it a 1/4″ seem allowance.
Now here comes the tricky part! I won’t lie, minky fabric can be an incredibly frustrating fabric to work with. It takes patience. Here are two great resources with tips for sewing with Minky fabric…HERE & HERE. P.S. I do not have the sewing machine foot they are talking about and mine come out fine, but I might consider getting one to try it.
7. Pin your minky to your cotton print right sides together, be sure all ribbon tags are tucked in and laying flat. Pin them together every 1″.
8. Begin stitching everything together with a 1/4″ seem allowance, be sure to leave a 3″ opening to flip the taggie blanket right side out.
9. Flip your taggie blanket right side out, use a small tipped object to poke your corners out.
10. Starting at the 3″ opening that you left for flipping begin sewing a 1/4″ seem allowance to close the taggie blanket and continue the stitch all around the edges of the blanket. This will help everything lay nice and flat and give it a tailored edge.
I had some old custom labels from selling on Etsy a while back and I like to add those to my gifts so they look a little more professional and it’s a cute reminder of where the blanket came from. You can order lots of custom labels on Etsy. It is not necessary to add one, but it sure is cute.
Roll it up and add a cute ribbon bow and add it’s ready to give to the special mom to be! You can even make up a cute little printable tag letting the mom to be know that the Taggie Blanket can be washed in cold water, and tumble dried on low, fabric softeners and stain removers are ok to use.
For even more baby shower gift ideas you can check out my post that has over 40 ideas for a handmade gift. Whether you mix a small handmade gift with a store bought one or simply just put together a basket filled with handmade goodies, the mom to be will love it all!





Your blog has some wonderful, fun and sometimes amazing things, which is why I follow you <3
This one has me stumped. I just do not know what this is — taggie blanket? Maybe I am getting too old.
Right now I am making a crib quilt and a floor blanket for our soon to be grandson. If I made one of these, would the new Mom know what it was?
Thanks so much for all you do here. I really enjoy your projects.
this is so great! Awesome tutorial! I only really know how to sew a straight line so this is perfect 🙂
@PB – This is a pretty popular item with some moms. It’s basically a small super soft blanket for babies to snuggle. It saves mom having to take a full size blanket for those kids who like having their faces covered to sleep and something to snuggle. 🙂 Thanks for asking!
I would say, innovation and creativity is the key for label printing industry. Logo and brand design skill is a must to achieve success in this sector.
Love this!!! I am going to make one for my daughter! She loves tags. I used to wonder why in the world people would have these for their kids…then my daughter came along! She sucks on the tags, chews on the tags, or plays with the tags more than the toy itself. Thanks for the tutorial! 🙂
HI Rebecca
I just wanted to thank you for your fantastic tutorial. This is the first time I have ever sewn with minky, and the first time I have ever made one of these. Your tutorial was very helpful 🙂 I am so so happy with the way this has turned out 🙂
Thanks Sara, I’m so glad you made one & even more excited that you love how it turned out. Minky can be tricky, so I love hearing that it worked great! Have a super week.
I’d like to make a suggestion on the length of the ribbon tags, having made these for quite a few years. I make my tags so that they extend only 1 1/2 inch from the edge of the fabric when finished. This will keep little hands and fingers from getting trapped in the ribbon loop. They are still long enough for visual and textural interest for the baby.