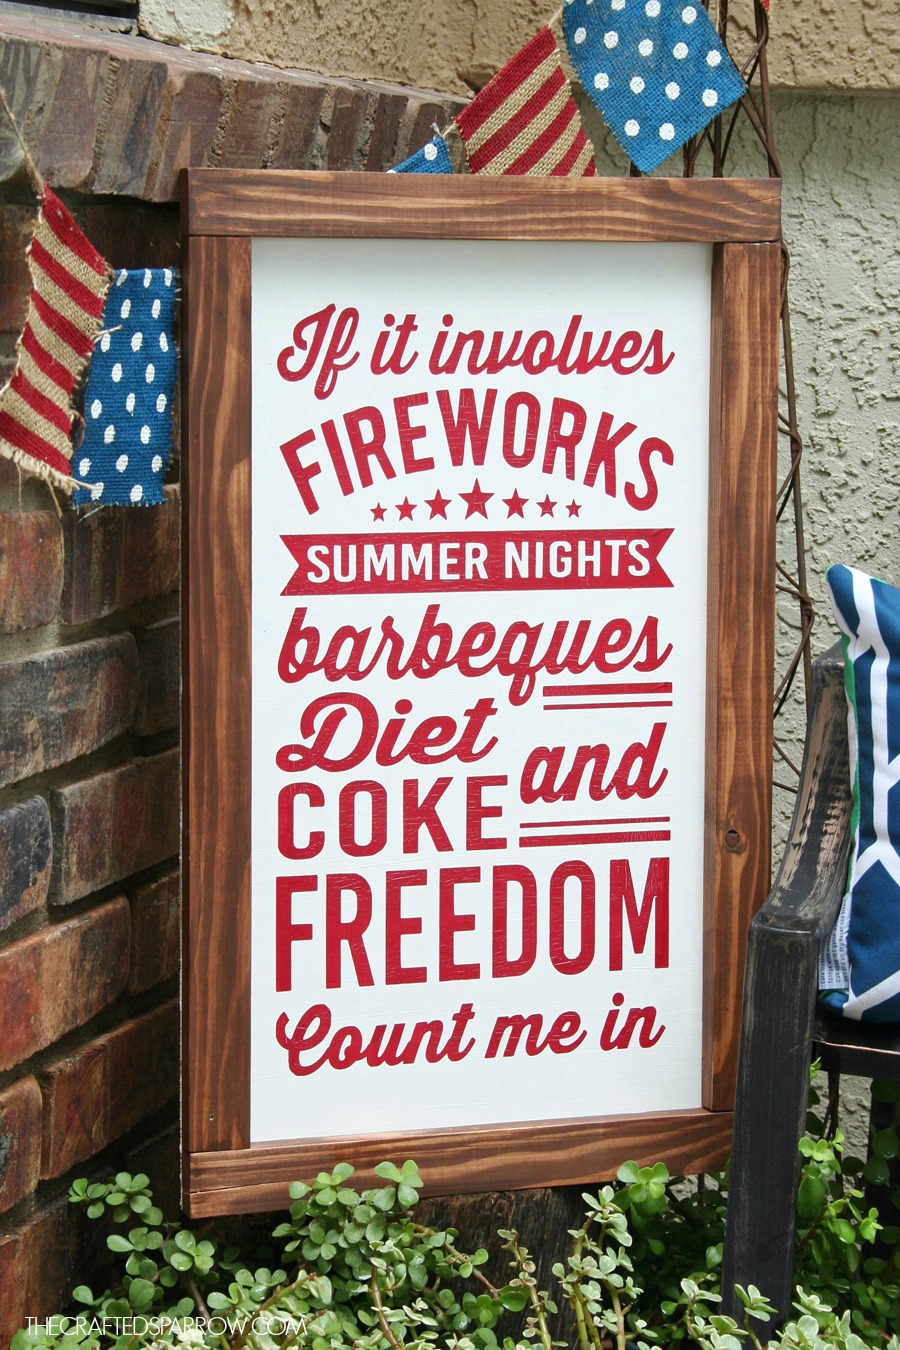
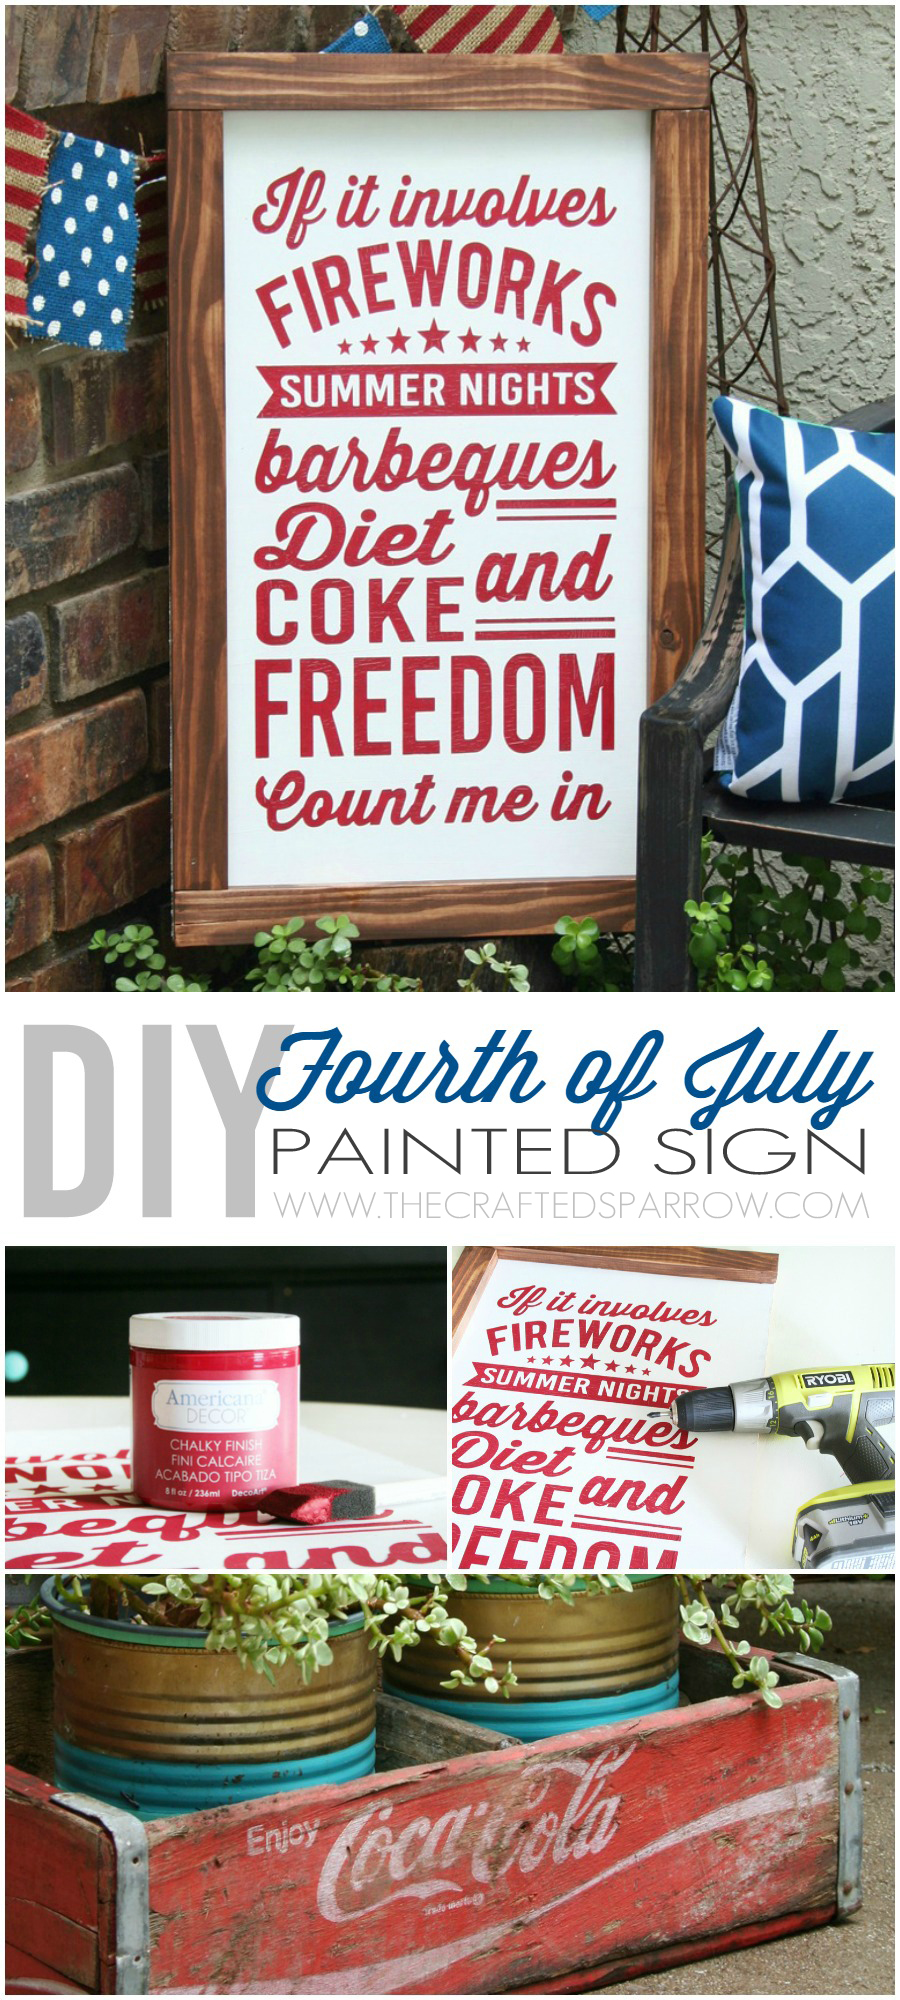
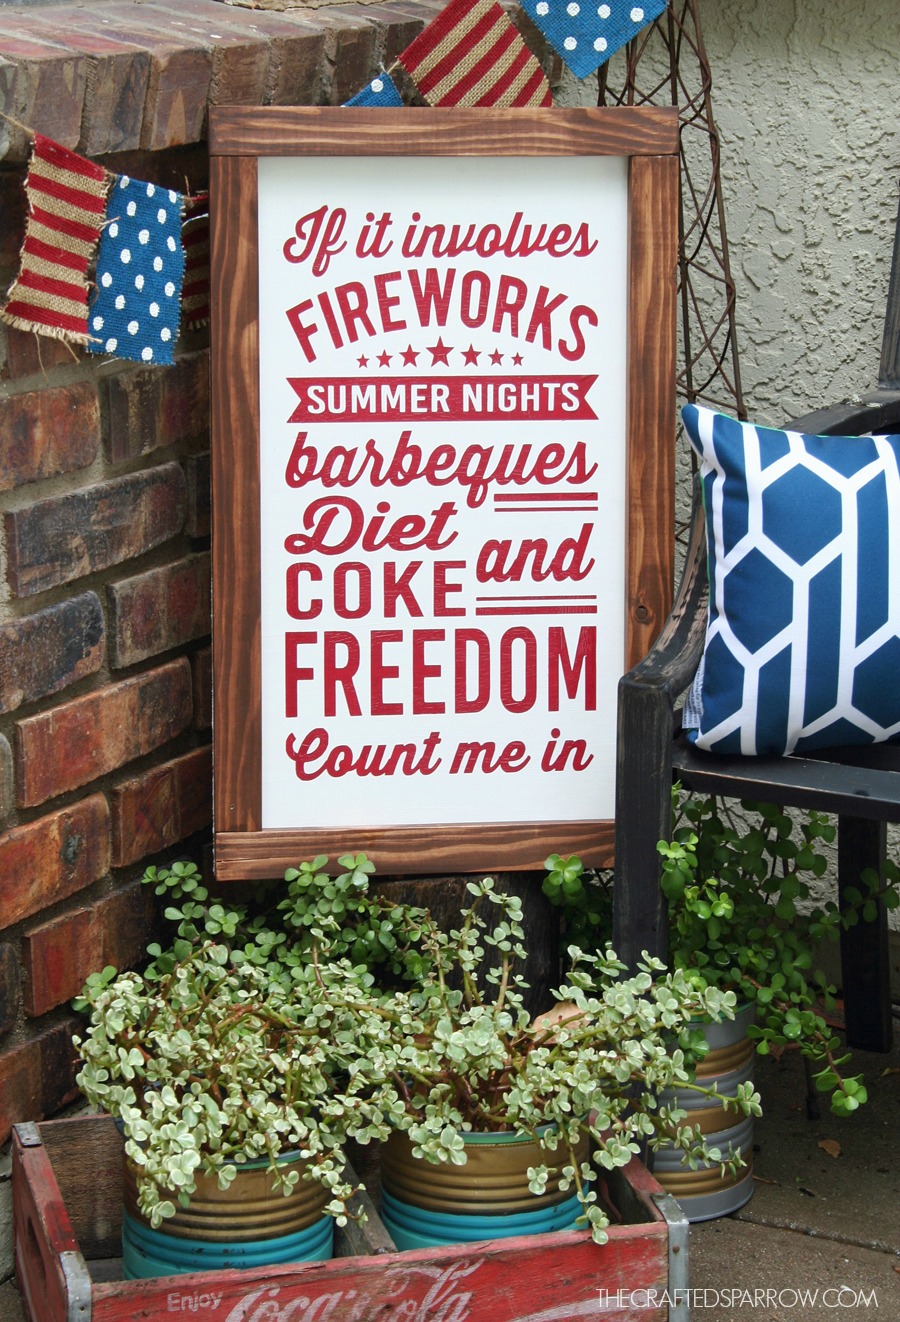
 I know how much people love the 4th of July, I just love July in general since it’s my birthday month…but there is something so special about all the awesome patriotic decor out and seeing how much everyone loves this holiday. I also know how much you guys love Diet Coke! Now while I’m a huge Coke Zero fan, I wanted to make something special that you guys would love because I love you guys! What’s a better combo than Diet Coke and the 4th of July?! I’m showing you how I made this fun 4th of July Sign.
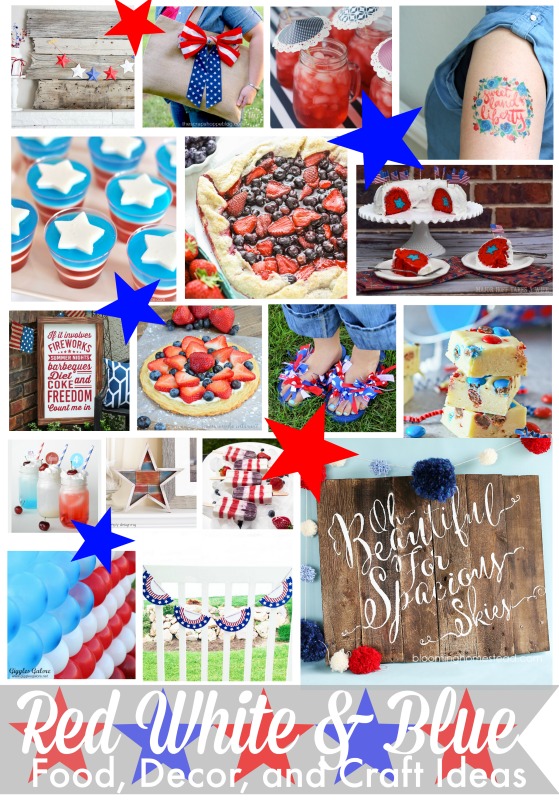
Be sure to check out all the amazing Red – White – & Blue projects from my friends at the bottom of this post when you’re finished reading through this project.
14.5 x 24″ Piece of MDF board (1/8″ thick – it’s sold usually in a 4 x 8′ piece at Home Depot by the peg board)
Pine 1 x 2″, cut (2) 21″ pieces and (2) 14.5″ pieces
DecoArt Americana chalky finish paint, Everlasting (white) and Romance (Red)
DecoArt Americana soft touch varnish
Americana gel stain, Walnut
Americana decoupage, matte
Foam brushes, 3 – 4
Soft cloth for waxing
Cricut Explore Air
Vinyl stencil, feel free to use my template found HERE
Drill
1/2″ Screws
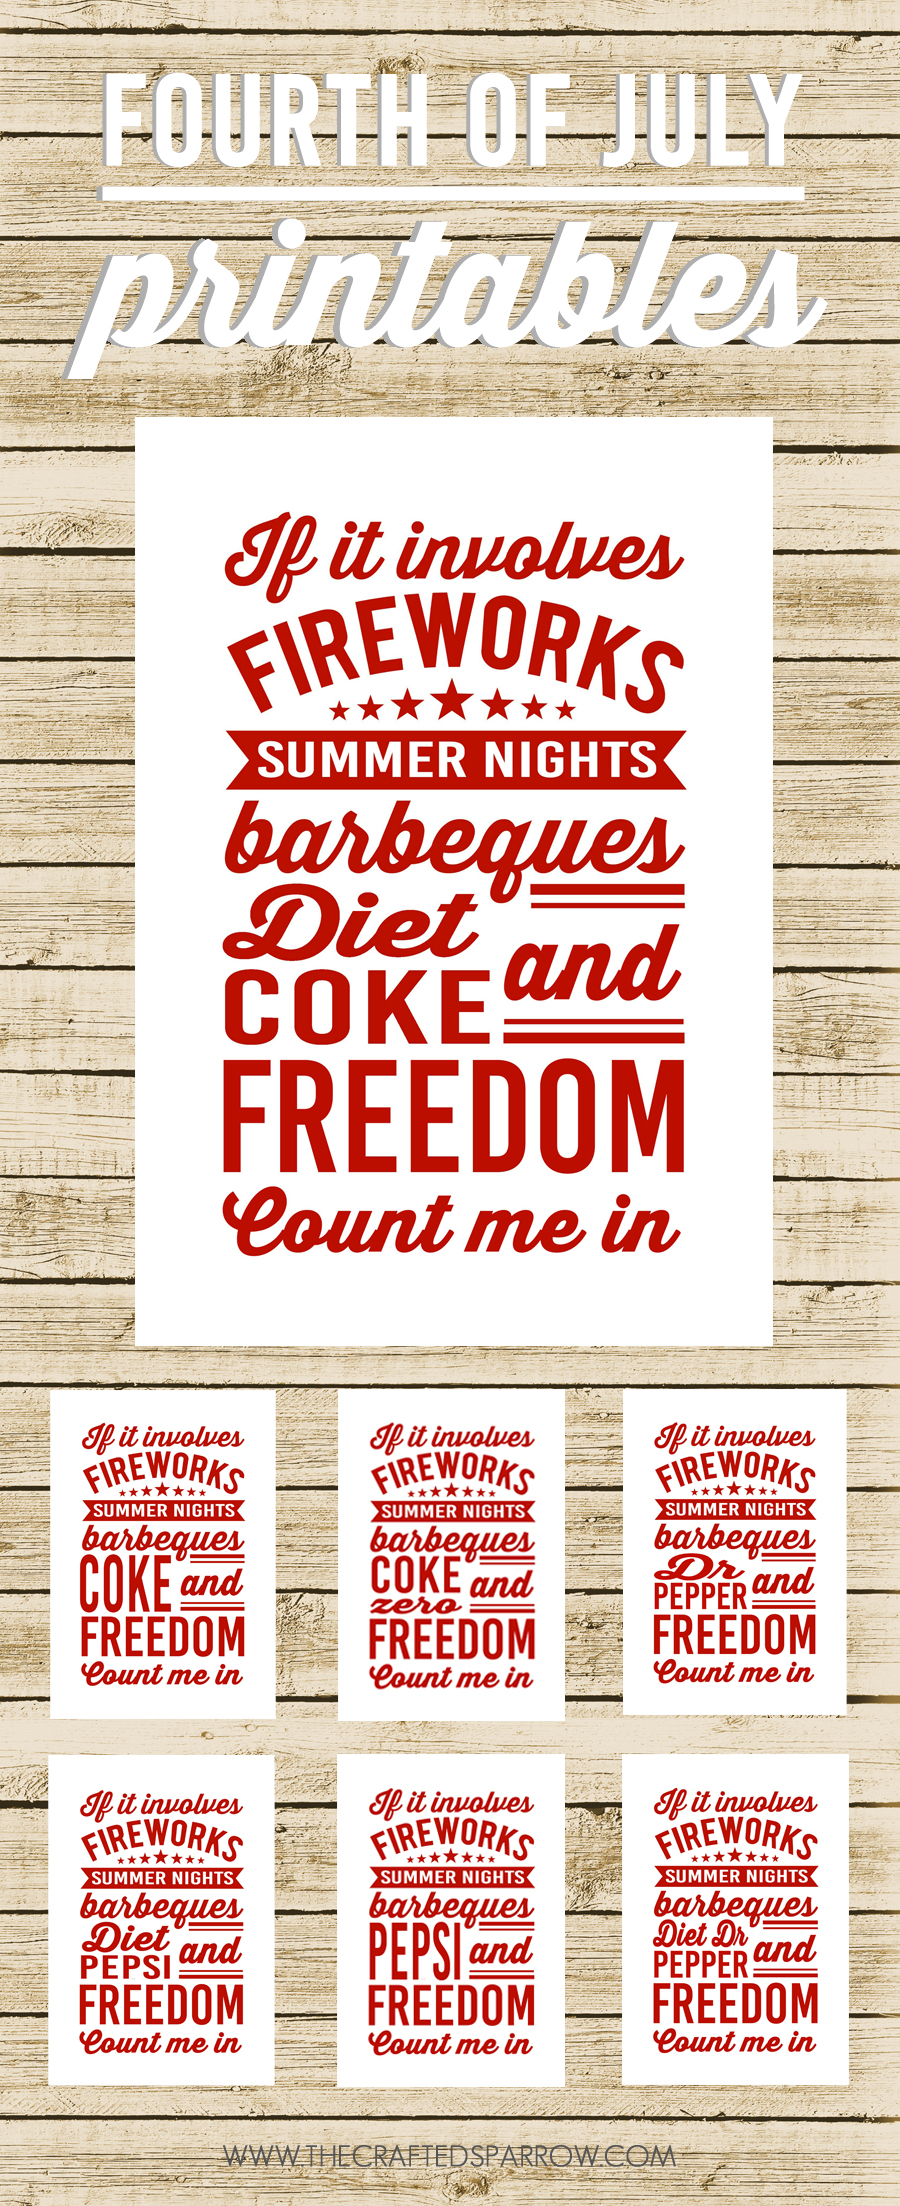
*Please Note: The above printables and downloads designed by The Crafted Sparrow are for personal use only. Please do not alter the file or image and claim it as your own. This file and this sign idea is not intended for resale, nor are the printed version of this file!
Begin by painting the smooth side of your MDF board white with the Americana Decor chalky finish paint. You will need 2 – 3 coats, be sure to let each coat dry 10 -15 minutes at least before applying the next coat.
I designed a fun graphic and uploaded my image to Cricut Design Space so I could create a vinyl stencil to cut with my Cricut Explore Air. Once I had the image cut and weeded I applied the vinyl stencil to the front of my painted MDF board with transfer tape, being sure to use a ruler to center it before applying it. HERE’S another sign I’ve made using these techniques for more photos of the process.
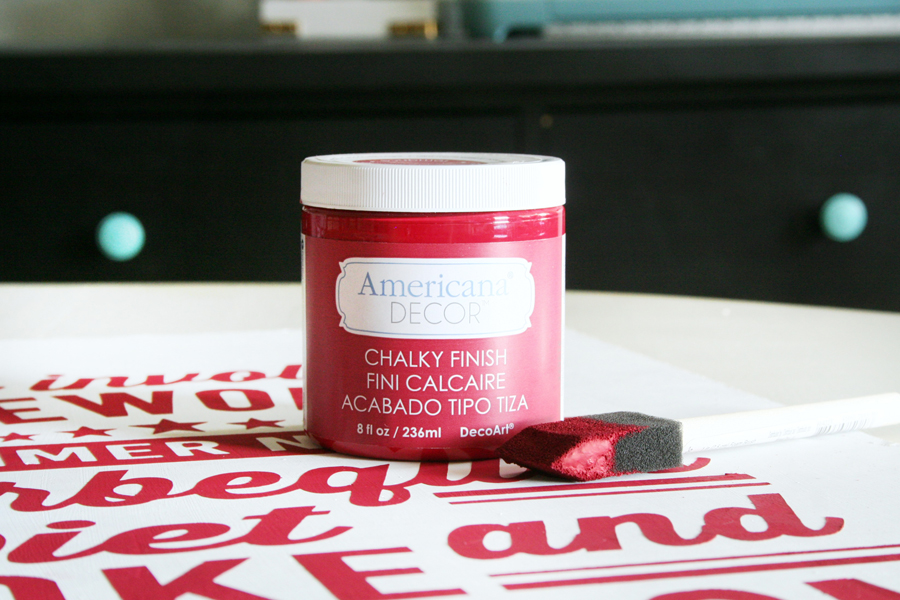 Once you’re sure the vinyl stencil is in place and completely smoothed with your smoothing tool I have a trick for you to get perfect signs every time! If you apply some decoupage over the portion you want painted and let it dry it creates a seal that won’t allow paint to bleed under the stencil. Once the decoupage is dry apply the red chalky finish paint to your stencil. You will only need 2 coats. just before it’s all dry remove the vinyl stencil carefully.
When all the paint is dry you can seal your piece with a soft touch varnish for a durable finish. I did this because my sign might endure some weather while on my front porch.
Stain your 1 x 2’s with the Americana gel stain using a foam brush and soft cloth or paper towel. Basically brush it on, and remove the excess with the towel or cloth. This is by far my favorite method of staining, little to no mess and it dries super quick. I also suggest sealing the stained 1 x 2’s with the soft touch varnish as well to prevent the stain from running if it gets wet. This is totally optional, if your sign will be indoors then no need to worry.
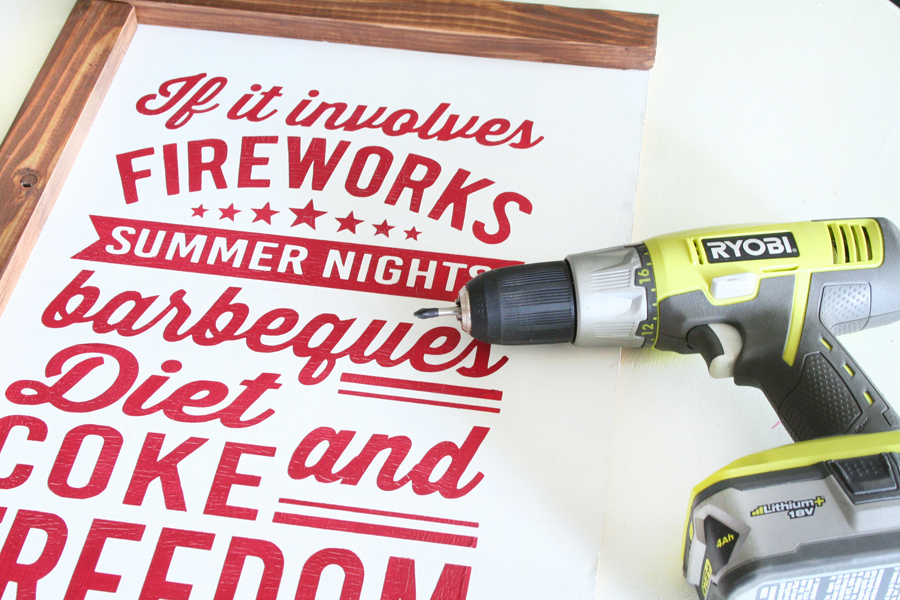
 Now it’s time to assemble your sign, using your favorite drill (mines Ryobi) attach the 1 x 2 trim pieces to the edges of your sign. Just align the top and bottom pieces first. You will need to pre-drill pilot holes using a drill bit just a smidge smaller than your screw size. This will keep your pine trim from splitting when you drill the screws in.
In case you were wondering, I totally forgot to start with pilot holes when I drilled the first screws because I was so excited to put the sign together and see if finish that I split two corners. I left them split in the photos and on the sign, I figure it adds more character! So be sure to drill the pilot holes first.
You will need to drill one screw from the back of the sign on each corner piece of trim. So 8 screws total.
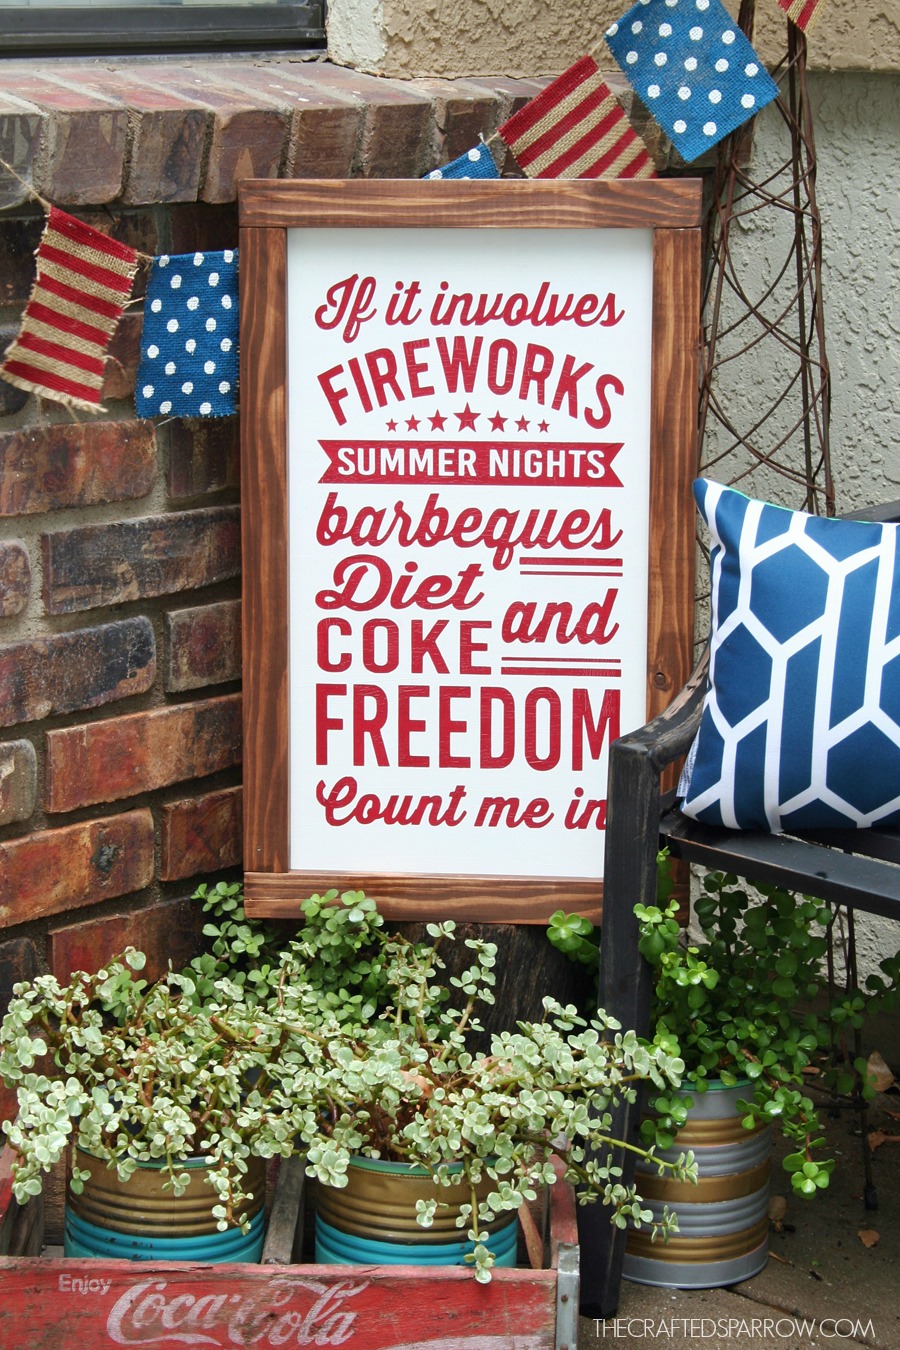
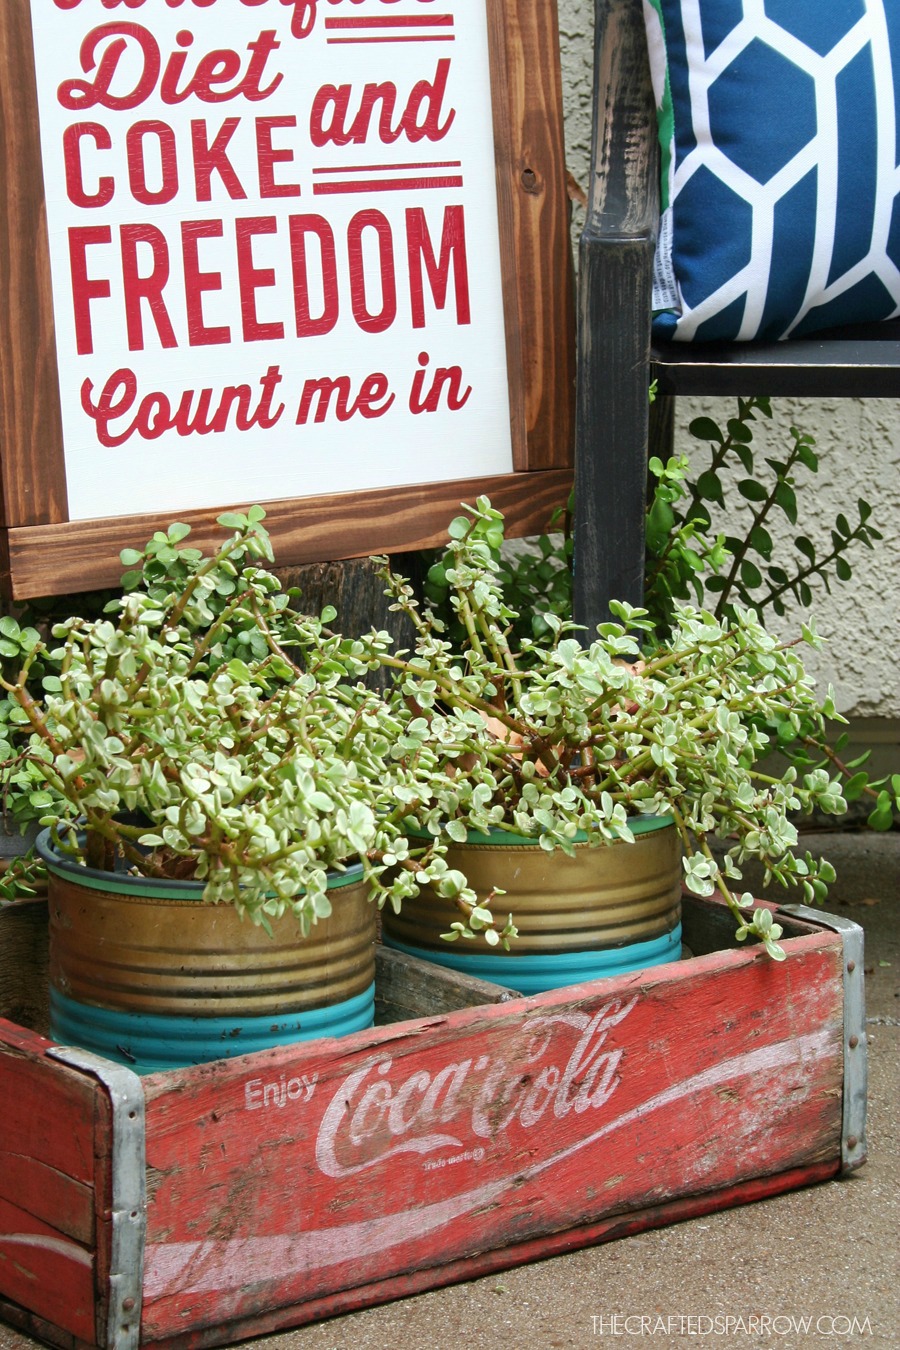
 That’s it! By the way do you see how my sign is distressed in the above pic, crackled sort of? That was purely an accident, I’m pretty sure it was caused by the MDF board and the finish it had on it. Regardless, it was an accident but made this sign 100 times better since I didn’t have to sand it to age it.
I hope you love this sign as much as I do! Even if it does say Diet Coke, I might change that to say Coke Zero someday. It goes so perfectly with the vintage Coke crate some sweet friends gave me last year for my birthday. Want to know more about that easy 4th of July Painted Burlap Banner in the photo, go HERE.
Don’t forget to check back next week for a special something extra that goes with this sign!
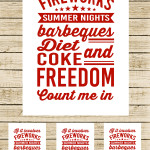
 Don’t want to make the sign? Be sure to snag the free 4th of July Printables HERE.
 Be sure to check out all these other amazing projects & ideas!


Love this so much lady! Pretty sure I’m going to make one this weekend for my front porch! You’re so crazy talented!
Thanks friend! xoxoxo
Your sign turned out beautiful! Thanks for the technique tip. I haven’t done a stencil that way before. Just curious if you tried to keep it from the stencil edges or didn’t worry about it as you pull up stencil before paint is completely dry? Hope that makes sense.
Great round up too!
Hi Theresa, thank you so much! If I’m understanding correctly are you asking if as I remove the stencil with still semi-wet paint if I peel it a certain way to avoid smudging it on another part of the sign? If so, then yes I work from one corner and in small sections on a sign this size and peel towards the center of the sign. Make sense? I’ve never had issue and if for some reason I did, a small brush and touch up paint would cover a mistake great. 🙂 Have a super weekend.
wow. this is perfect. and i adore how you framed it in. seriously in love!
Oh thank you so much friend! You’re so sweet! Have a super weekend xoxoxo
This is so cute – I love painted signs, but I never knew how to do it. Looks like I need to invest in your vinyl cutter (though I might have a hard time convincing my hubby that it really is a “need”, lol.) Also love the cute banner.:-)
Thank you so much Susan! Yes, a vinyl cutter like the Cricut Explore is a total game changer in your crafting life! For years I cut things by hand. You can always do that, and just pencil it on a sign then paint. 🙂 Have a super week! 🙂
I LOVE this sign – just wonderful 🙂
Enjoy your 4th July celebrations
Thank you so much Sarah! Hope you have a fantastic 4th of July holiday!
This is just so adorable!! I really appreciate that you would take the time to make the printables and share them. Thanks so much!
By the way, it’s Diet Coke for me and I spell barbeque that way. 🙂
Thanks so much Stacey! It’s my pleasure, I’m so glad people love them! Have a super week!
This is absolutely adorable. Can you tell me what fonts you used? Mela 🙂
I love this sign! Unfortunately, I am not very crafty, and I know if I attempted this project it wouldn’t turn out as near as good. Is there any way I can please buy this sign?
Hi Elizabeth, thank you so much for your sweet words. Unfortunately, I currently don’t have any signs for sale but if I have considered making some before the summer months. If I do I will for sure email you and let you know, does that work? 🙂
Yes! That would be great. Thank you so much!
Do you happen to have a cut file? I am going crazy over here trying to get it to trace and cut in silhouette an it won’t work:( It’s for my moms bday gift tomorrow:( thanks so much
Just emailed you Haley. Hope it works. 🙂
Can you send me a cut file as well? I am having the same problem it seems – thanks!
Hi Cherilyn. You need to go to this post: http://www.thecraftedsparrow.com/2015/06/4th-of-july-printables.html to download the printable document. Then you will need to upload it to your cutting software and create a cuttable image. There is not a cut file to send to you since Cricut doesn’t allow me to create them and make them public without approval from them. 🙂
Maybe I’m too late. I really want to make one of your cute signs for my new porch. I don’t see a file anywhere. Is it still available?
Hi Anna,
You can find a link to the printables here:
http://www.thecraftedsparrow.com/2015/06/4th-of-july-printables.html
Just download the file and if you’re using it to make a painted sign version then upload it to your cutting software. 🙂
I love it! Where do you get the cloth for waxing? Does any scrap cloth work? (Old shirt?)
Hi Audrina, thank you! You can use any lint free cloth for waxing, old cloth t-shirts work – they also sell small jersey scraps usually in the paint section at Home Depot. 🙂
how big do you cut the stencil? I have all of the wood ready to paint 🙂
Hi Audrina. It’s really up to you what size you want to cut it. I typically like to leave about 1 – 1.5″ margins on the sides of my stencil and 1 – 2″ on the top and bottom margins depending on the look of the design from the sides of my wood frame. If you’re using a wood frame for this you would just lay the pieces down and measure inside the frame and go from there. 🙂